
28/05/2024
Share:
Taking screenshots in Excel is easy, but there's a better way to capture anything on a spreadsheet and paste it anywhere in your workbook, with automatic updates when the data changes. This can be done using Excel’s hidden Camera tool, which creates linked images.
Unlike complex methods like INDEX MATCH or XLOOKUP, the Camera tool offers a simple, formula-free solution. It's a button you can add to the Quick Access Toolbar, though it's not enabled by default.
Note: The Camera tool is different from Excel’s Screenshot tool found under the Insert tab in Illustrations. The Screenshot tool can take screen clippings, but it doesn't create linked images.
How to Enable the Camera in Microsoft Excel:
Since the Camera tool is a hidden feature, you need to enable it manually. Here’s how:
- Go to the Home screen (the Backstage view) on Excel from File on the menu bar.
- Select Options from the bottom of the left sidebar. In Excel Options, open the settings for the Quick Access Toolbar from the list on the left.
- Select the dropdown for Choose commands from and pick All Commands.
- Under All Commands, go down the alphabetical list and select Camera.
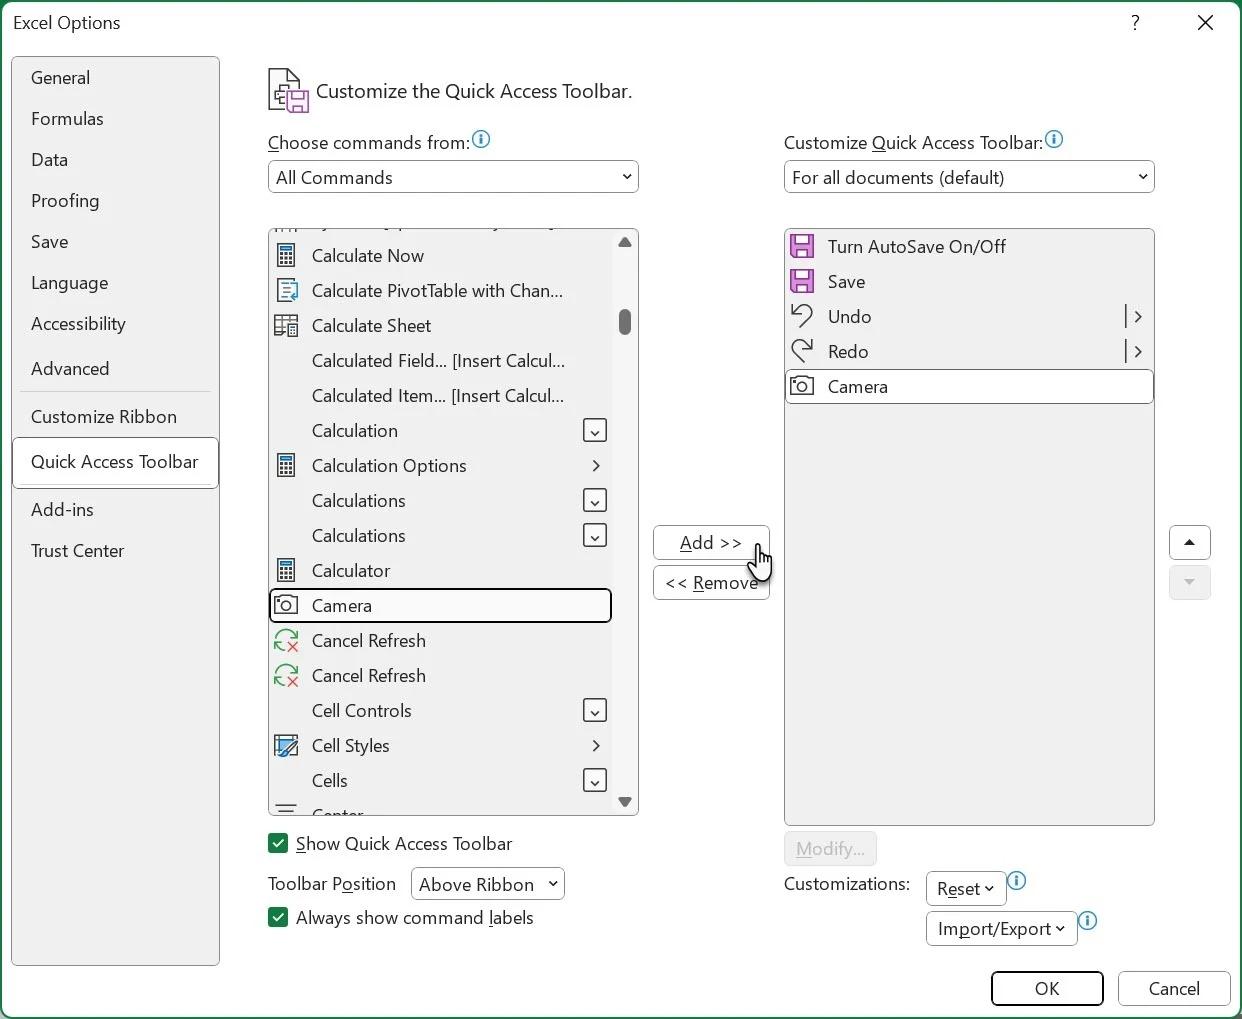
- Click the Add button between the two boxes to include the Camera tool in the Quick Access toolbar.
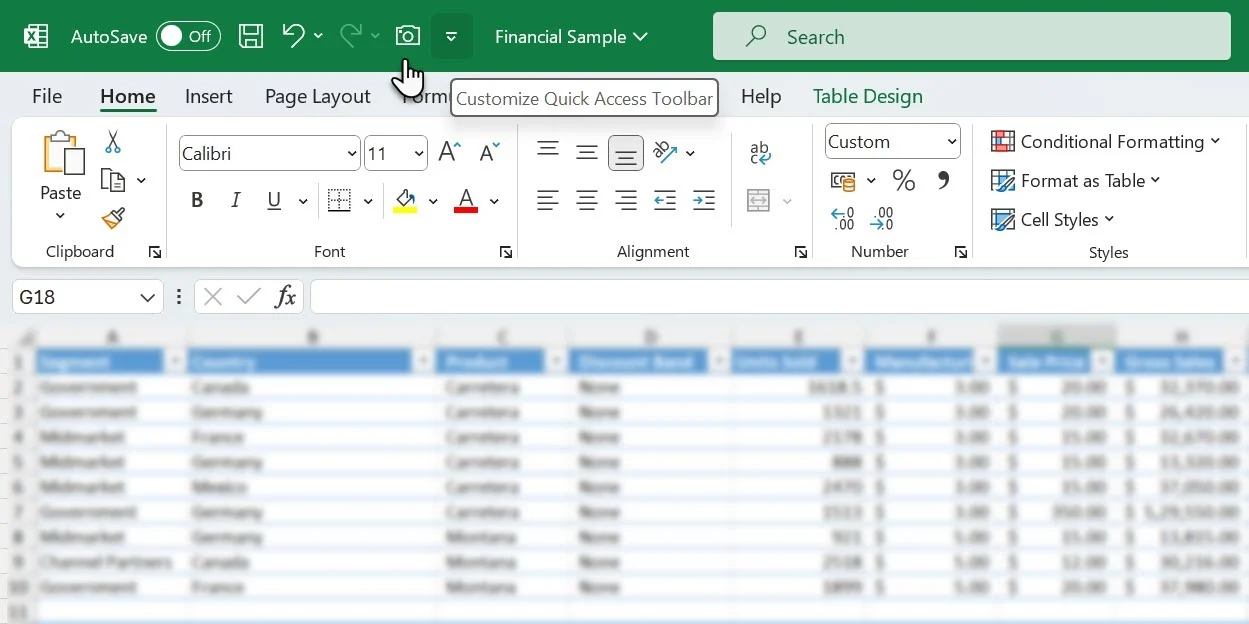
- Go to an open spreadsheet, and you can see the Camera button on the Quick Access toolbar
Alternatively, you can customize the Quick Access Toolbar by clicking the small down-pointing arrow for Customize Quick Access Toolbar. From the menu, select More Commands... and then follow the same steps mentioned above.
How to Use the Microsoft Excel Camera
Now that the Camera tool is part of your Excel toolkit, you can take quick, dynamic screenshots of your data. Here's a basic example of how it works:
- Open Your Spreadsheet: Start with the spreadsheet containing the data or chart you want to capture.
- Select the Data: Highlight the data range or chart you want to capture.
- Click the Camera Button: On the Quick Access Toolbar, click the Camera button.
- Paste the Data: Navigate to the worksheet where you want to paste the data. Click the location where you want to insert the captured image. The cursor will change to a tiny crosshair. Drag and release the crosshair to paste the data.
Using the Camera Tool in Excel for Linked Snapshots
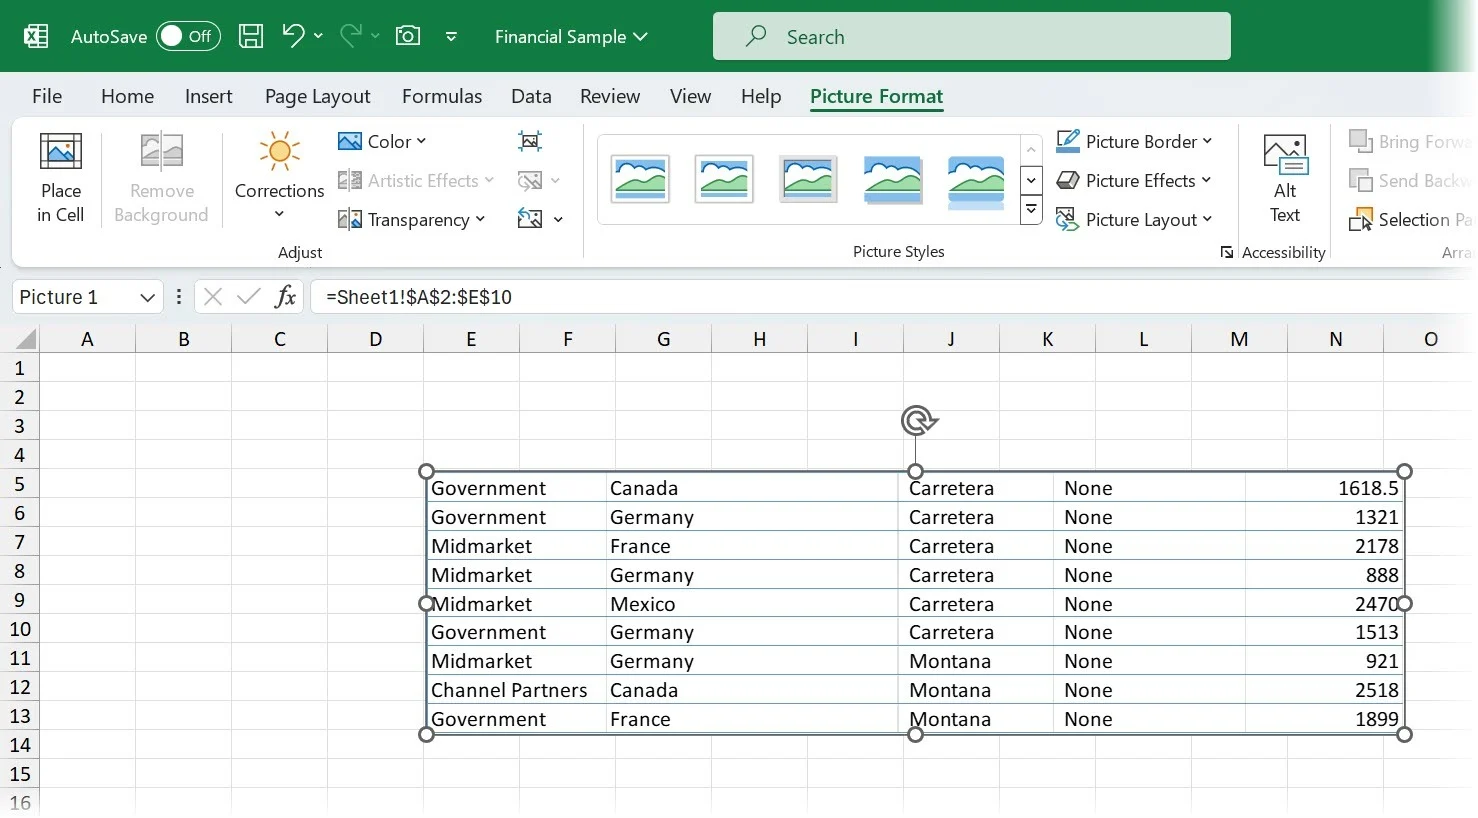
When pasting an image, you can use any formatting options available on the Picture tab in the Ribbon to customize its appearance.
The standout feature of the Camera tool is that it links two worksheets rather than just taking a simple screenshot. Here’s how you can save time and create more efficient spreadsheets with this tool.
How to Use the Camera Button in Excel for Linked Snapshots:
The Camera button simplifies working with data across spreadsheets. It allows you to copy a range of data cells or a chart and paste it as a linked image in the same spreadsheet, another sheet within the same workbook, or an entirely different workbook.
Steps:
- Select Data: Choose the range of cells or chart you want to capture.
- Click the Camera Button: On the Quick Access Toolbar, click the Camera button.
- Paste the Image: Navigate to the location where you want to paste the linked image. Click to paste it.
Once the image is pasted, any changes made to the original data or chart will automatically update in the linked image.
Possible Use Cases:
- Collect Data: Gather data from different sheets and paste them as dynamic snapshots on a common sheet for presentation or printing.
- Create Dashboards: Build dynamic dashboards that display real-time information as the linked data updates.
- Micro-Charts: Take a linked snapshot of a small section of a larger chart to share specific information.
- Monitor Important Cells: Manage large datasets by monitoring crucial cells with their snapshots spread across multiple sheets and workbooks.
You can also use the Camera tool to paste data into Word and PowerPoint documents, though the images won’t be linked. This feature can still help you create presentations and reports more efficiently.
Saikat Basu (https://www.lifehacker.com.au/)